Saturday, September 3, 2016

Local Units

Squire Takus talked today about units, specifically his unit (Wolves of the North).  I got to talking to a few people and realized that we don't have a great resource to identify units, their members, and what they do on and off the field.

So what is a unit?  For the most part, a unit is a group of fighters that fight together, train together, and try to coordinate their fighting on the field to a much higher degree than a loose collection of people would.  They usually include some sort of rank/command structure and a general style of fighting as a group.  At most events, we also do 'unit battles' where each unit fights on their own team. Outside of fighting, units are often friends that hang out and have fun off the field.  You will also find that most units choose to camp together at larger events.  Along with that, units are generally set up to help their newer members gear up and often coordinate to help each other work on fighting related projects like garb, armor, and weapons.

Each unit also has its own method of accepting new members, usually into some sort of grace period known as petitioning or pledging.  This is a chance for the unit and potential recruit to figure out if they are a good fit for each other. Different units also have a variety of trials, either for membership or to advance ranks within the group.  Sometimes, you'll hear someone refer to a "barrel", this is a specific type of trial involving fighting a long series of fights.

There are many more units out there than I will talk about today, since I'm only going to be looking at units with members that fight in Numenor (at UIUC).  Several of the units represented locally are also national units, with members spread all across the country that get together to fight at events.

Wolves of the North:

Squire Takus recently founded the Wolves with the intent of making a unit that was accessible to newer fighters.  The end goal is to get a combined arms group using a mix of flanking, an armored front line, and support weapons like spears, glaives, and bows all working together. This is a great unit to look at if you are wanting to try out the unit experience and see what it is all about.

As a newer unit, I don't know their process of inducting new members, so feel free to ask Takus about it.

Local members include: Squire Takus (leader/founder), Sir Gradamere, Macintosh, and Finrod (among others).

The Amyr:


The Amyr is a unit with a strong focus on training themselves and teaching others.  While fairly small in number nationally, their average skill and fitness is generally higher than most units. A majority (I think?) of the unit is currently local to Numenor.  The typical gear you will find them with is either sword and shield or two swords. Almost all of them have fancy garb with the lotus symbol on it.

I don't know too much about their rank structure, but there are plenty of people to talk to if you are interested.

Local members include: Sir Cyric, Sir Hurin, Dame Volpin, Sir Himmel, Horus, and Arc (and many more).

Urak-Hai:
Another unit inspired by Lord of the Rings, the Urak-Hai are designed to be a hard hitting, heavily armored unit.  Founded by Sir Vhil (a local knight that is a rare sight), many of the unit's inner workings are designed to inspire the members to conform to the hard hitting group they are named after.  In order to achieve the rank of Ravager, for example, a member has to achieve so many points in various challenges of strength.  They also have a minigame called "Ork Bowling" where various members compete to knock down the most people (from standing) in a given day.

While once very large locally, many of their members have moved, and are now spread out nationally.  At larger events, you will see a large group of fully armored up orks charging into the enemy line, not simply to kill them, but to bash their way through.

Local members include: Feral (local leader), Sir Orso, Rainbow Shark, and Shadrac.

Dark Guard:

Dark Guard was founded locally by the now retired Sir Klaws from former members of the Urak-Hai, and still has a majority of its active members in town.  Their primary focus is flanking and exploiting the weaknesses in the enemy line. They work very well in pairs and small groups.

The unit's "theme" is based on Mordor, from Lord of the Rings.  For example, the Nine Nazgul are the veterans and leadership of the unit, a rank that was achieved by completing a series of trials to put their skills to the test.

Local members include: Sir Sarif (leader), Nikita(leader), Kabibbles(leader), Squire Larkin, and Squire Kyle.

Black Company:


The Black Company draws its name and mercenary theme from the book series of the same name.  As a true group of mercenaries, during unit and realm battles, they are often contracted out to different groups--accepting a variety of forms of payment, like beer.

For a long time, the entire unit would carry javelins, along with their usual gear.  The group itself is well known for the trials they place their petitioners (those wishing to join the unit) through, including a number of pushups with each headshot or death.

Draggeron is the only full member locally (I think?), but petitioners Lynard, Simba and Bean fight locally as well.
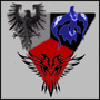
Triad.GIF
The Triad:

The Triad is actually three different units, that all come from the same origin many years ago and sometimes group up at events.  The three all started as Brotherhood of the Falcon, then split into three groups: Brotherhood of the Falcon, Elite Blood Falcons, and Dark Angels.

The three units are fairly close nit, often referring members of the other two as "cousin", a reference to the Brotherhood origins.

Brotherhood of the Falcon:

Often shortened to BOF, Brotherhood of the Falcon centered around teamwork and family.  Full members refer to each other as "Brother", both as a rank, and a sign of being part of a family.  On the field, they used a combined arms approach with a heavy front line of large shields and armor supported by a few support weapons and a strong group of flankers.  They spend some time drilling and practicing working in pairs.

Joining the unit requires a full member to sponsor you as a pledge.  During time as a pledge, it is a chance for you and the unit to decide if you are a good fit for each other.

Much of the rank structure and iconography used by the unit is drawn from Warhammer/Warhammer 40k, which a number of members play.  Spotting their members is usually easy, they all wear a belt sash with the Falcon on it. Local membership is limited, but nationally the unit is quite large.

Local members include: Sir Piper (national leader), Sir Torry, Sir Rukus, Zuloo, and Bronek.

Elite Blood Falcons:

Elite Blood Falcons, EBF for short, is similar to BOF in their family approach to their members.  The most common equipment used by several of its members is flail and shield.  Those wishing to join the EBF are known as "Almost Blood Falcons", ABF, which function similarly to petitioners/pledges to other units.

In order to ascend from ABF to EBF, they must complete a trial where they must protect an unarmed (and pierced in both limbs) person from a few waves of attackers.  This barrier to full membership helps keep the unit's overall skill on the field high.

Some of the EBF's trials are named after those of the Clans from Battletech/Mechwarrior, though similarities are limited. While small locallly, the unit has a fair number of members nationally.

Local member is Sir Galin.


Tuesday, March 1, 2016

Weapon Roles, Part 2

Last time I talked about weapon roles and different ways to get the most out of different fighting styles on their own.  Today's post is all about how those different styles interact and build off of one another. Rather than going through every style combination one by one, I've decided to focus on the basics of what makes individual styles work together, with a few examples in the form of some likely pairs.

Range Control

One of the primary reasons to work together with different styles is range. Every style has a weakness in this category.  Archers and polearms can't do much at close range, shieldmen and two stick fighters lack range to deal with polearms, and min reds have a mix of both problems.  By combining different styles, with different weaknesses in range, a pair can overcome this problem.  Possibly the most common pairing that demonstrates this is a polearm and a shield man.  The polearm is weak at close range, but the shieldman can fight perfectly fine at that range.  Meanwhile, the polearm can help against targets that out-range the shieldman.

This crudely photoshopped image demonstrates the overlapping range presented by a shieldman/polearm team. Note the danger to any target that would stand in the glaive's two handed range. 
The overall effect of this combination of ranges means the an enemy shieldman doesn't have an obvious range to prefer.  Staying at the outer bounds of the shieldman's range means the enemy can't easily attack.  They also can't close on the polearm without being in range of the shieldman's attack.  Better yet, the team also creates a range that is extremely advantageous for them.  In the zone where their ranges overlap, they can both work against the same target.  In the sample above, that means the glaive can be dishing out two-handed strikes while his shieldman is able to swing effectively at the target.

While shieldmen and dual wielders might seem to be the only styles to fit into this close range defense, other styles can also accomplish this task.  Take, for example, a pair of polearms.  Both polearms may suffer at short/close range, but by maneuvering themselves in such a way that their more preferred ranges overlap with each other's weaknesses, they can effectively negate much of this weakness.  One example might be in a formation similar to a phalanx.  The front spear has the longest range and engages targets first.  Behind him, a second spear engages anyone that is able to close on the first spear. Anyone lingering too long in medium range would be fully engaged by both.  This same pair might also exist on a line, spaced out so they can engage against anyone rushing the other while still both engaged against the enemy line.

Risk Management

Combining two shorter ranged fighters poses a different challenge.  Neither of them can reach long range, so the combination doesn't mitigate the weakness.  However, a short ranged pairing can have other benefits.  Lets take a shieldman and dual wielding fighter as an example.  The shieldman has superior defense against missiles and spears, but doesn't have as wide of a shot selection.  This combination allows the shieldman to help reduce the risk of his partner being taken out at long range, while giving the pair exceptional offense once they are able to close to their optimum range.

Risk also comes into play when considering shot selection.  What might be a risky shot in a duel, can now be covered by your partner to make it relatively safe.  One example might be a min red fighter swinging one-handed towards the opponent's sword side, forcing them to block.  This takes the risk away from his partner's attacks, allowing them to choose from a wider variety of shots.  By the same token, the min red might be safe to attack the opponent's shield with a few two-handed swings while his partner cuts off the angle their opponent might have been able to attack from.

Combined Threat

While risk management is about keeping safe on offense, combining the threat of different equipment is all about increasing the opponent's risk.  Choosing the pair equipment that threatens different target areas or angles forces the opponent to make difficult decisions.  Lower their shield to help block off spear stabs or take an arrow to the face, for example.

Spears are often a natural pairing when discussing threat.  Their long range allows them to attack from a variety of angles, even from behind the front line.  Lower angles of attack force shields to come down a bit, while moving more towards sword side to cover the hip.  Other weapons can take great advantage of this shield position, such as flails, glaives, and min reds.  All of these weapons excel at placing shots on the shield side shoulder, which will kill the target or force their guard up and away from the spear.

Threat also has great influence on the enemy's ability to attack.  Archers are a prime example.  Other than shieldmen, no one has great defense against arrows other than perhaps mobility or a helmet.  Even without shooting, the archer can apply threat by holding an arrow at the ready.  Those without shields are forced to either gamble on dodging or to duck for cover behind a shieldman.  Most choose the latter.  Because they are forced to the second rank, they have a harder time applying offense to the front.  Even though spears and glaives can reach targets from the second rank, their own shieldman cuts off a significant angle of their attack, limiting their options for targets. As you might have noticed, this is nearly a case of risk management achieved through the application of threat.

Total Offense

Combined total offense of a pair of styles may give the combination an advantage.  While threat is about opening the target up and increasing their risk, total offense is about overwhelming a target's ability to block. A pair using glaives or other two handers, might be a good example.  Regardless of the threat applied by either glaive, the pair can simply place enough two handed strikes on one target to negate the defense of a shield.  Four solid, shield breaking hits to a shield outright kills anyone, assuming they haven't dropped it before then.  The first two take the shield, the third the arm, and the forth takes the body.  This means that each glaive only needs to successfully land a single hit on the shield for the pair to be able to remove it from the equation.  They may only need two swings each to kill a target, even less if they get a limb or two.

The major drawback of a pairing like this is that it relies on killing targets before they can return strikes to the pair.  A combined charge from multiple targets or a threat that has greater range than the pair greatly reduces their effectiveness. However, while working together with a team on the line, this type of pair may be able to overwhelm a few targets quickly.

Conclusion

Working together with different styles and gear boils down to playing off of your team's strengths and covering each other's weaknesses.  Even though I have written this from the perspective of a pair fighting some target, pairs are a natural building block towards full line fighting.  Take a moment next time you are on the sidelines to watch how the line includes many of these pairings of equipment.  Even in larger groups that seem to be all working together, much of their teamwork will be done within pairs of fighters occasionally supporting other pairs.  This is especially true when looking at how support weapons are deployed.

When combining equipment and styles, the four categories I've mentioned above are all worth considering.  However, regardless of what combination, they all benefit greatly from teamwork and communication. Find a friend, work together, kill lots of people with foam covered sticks.

Tuesday, February 23, 2016

Weapon Roles

This is the first in a series of recent requests.  I'm a little rusty, so this on isn't quite up to the typical standard.  I'll try to do better next time, which will be soon-ish*. Part 2 of this topic is now posted.

In previous posts, I've discussed the various roles a fighter could take on the field and a little bit about how different roles can interact. Today I'd like to take a look at how different weapons and fighting styles fit in to the mix and the roles they serve on the battlefield. In a future post, I'll be looking at how these different weapons and fighting styles can be used in conjunction to maximum effect.

Arrows and Javelins

Missile weapons can rack up a large kill tally, but their primary role in a fight is to take down key targets.  This often means targeting enemy support weapons, skilled archers, or even great shieldmen that are making an impact on the fight.  A few well placed shots can have a dramatic effect on the line.  All of a sudden, one side might have a significant advantage in polearms on one flank and be able to gain a major breakthrough.  Even taking an arm or leg of a support weapon will generally sway the fight against them.

When missiles don't have a good line on hitting a target, they can still offer a significant threat from a distance to limit that fighter's options for position and strikes.  By having an arrow nocked or a javelin pointed, it will usually cause the other team to cover up and slow their offense for a little bit. As with other support weapons, the goal is to have an impact on the fight, either through kills, wounds, or threat.

Min Red

"Min Reds" are roughly the smallest possible size to be considered a red weapon (minimum 24 oz, 48" long in Belegarth).  In an intense, packed line fight, we often see them sort of trumped by 8'+ polearms.  However, they do still fit into a very useful niche as a very fast, anti-armor weapon.  While they can break shields, their low weight and short range make it much harder to land a solid, shield-breaking hit.  They are best used on a thick line as an arm sniping weapon.  See an arm, hit the arm.  This lets the user stay relatively safe near a shieldman, while still out ranging enemy shieldmen as they swing.  When the lines are thinner, they are good when working in pairs with any other style. This reduced the danger of a rush and allows the user to utilize that bit of extra range to help their teammate.

Rather than fighting in a more fixed position on the front of the line, min red users are better suited to in/out, hit/run tactics.  By only advancing into range when they have a solid opportunity to take a limb or get a kill, they can mitigate much of the risk against polearms and missile weapons. Important to note here, however, is that extremely dense lines make getting in and getting out of the fight much more difficult--there just isn't enough room to get between teammates.

Another useful way to deploy weapons of similar length and weight is as a one-handed weapon with a shield.  Too slow and awkward for most one-on-one fights, the combination gives the user a great deal of reach over the typical shieldman.  When the line is dense, this advantage is further improved by reducing the enemy's ability to advance into their range.  This creates the ideal scenario in the range game, where you can strike at an opponent that can't reach you back (with the exception of support weapons).

Flails

All sorts of hate is always directed at flails, but they are an extremely effective tool--especially when combined with various support weapons. Many fighters haven't learned how to effectively defend against flails one-on-one, let alone when faced with other threats. On a heavily packed line, they excel at either exploiting or causing shields to be out of position.  As fighters lower their guards against spears, the flail makes quick kills targeting the shield side shoulder.  As people raise their guards to counter the flail, spears can more easily target the sword-side hip.

The other sort of key area for flails is in situations like flanks or gaps where the enemy isn't already prepared for fighting against them.  The typical fighter, when flanked or rushed, will default to the normal guards and blocks.  Flails require a slightly different approach to blocking and can catch fighters off guard, all while having their natural advantages. That's part of why we often see them used by flankers and shock troops. However, flails are shorter ranged than support weapons and max length one handed swords.

Two stick

Florentine, flo, two stick, dual wielding, whatever you would like to call it, often gets left out of line fighting. The advantage in defense of a shield or range in a polearm makes two sword a less obvious choice of weapon. Two swords can deal out a lot of damage in a short span of time with proper practice, position, and timing.  The key to using them in a line battle is to pick your moment to go in.  Vision gaps, staggered gaps, breakthroughs, or anywhere light on support weapons are great places to go.  The extra weapon allows you to apply significant pressure to a single target as well as a fair range of blocking (like a very tiny punch shield).

As a skirmisher, two stick can be very effective at winning a series of one-on-one fights.  Generally, they are good at taking down stray enemy fighters that can be singled out.  This includes shock troopers and flankers that have successfully broken through to the backfield.

Two stick really shines, though, when it can flank the enemy.  The ability to strike many targets quickly and efficiently can wreck a line that is facing the other way.  Even though they will have little defense against archers hanging out in the backfield, the two stick fighter can have a huge impact before they are shot.

Polearm

Polearms are really the main offensive tool of the line (at the initial phases of battle) and the primary defense against enemy polearms. While ranged weapons get some kills, polearms have a much higher attack rate and often a better angle of attack.  Add in the occasional glaive to break shields, and it is easy to see the damage they can inflict.  Besides directly killing targets, they are one of the best tools for pushing an enemy line back.  Most groups of fighters will back up to stay just outside of the range of a polearm, or advance to that point if the polearms back off.

The initial target of most polearms is other polearms.  However, weakening the shieldman around those polearms is an equally important job.  Taking a shieldman's leg reduces his ability to block missile weapons or to cut off the line of attack against polearms.  This makes it easier to take out the enemy polearm.  Event threatening those shieldmen will leave openings for friendly fighters to exploit, just like flails and missile weapons.

On defense, polearms play the role of disrupting the enemy.  Pushing spears off target, blocking off lines of attack, or threatening legs to slow an advance.  Their job here is to suppress the area and make their presence felt, even if they aren't getting kills or wounds.  This is similar to missile weapons being a threat, but requires the polearm to attack very quickly against many targets, while trying to fend off enemy polearms.

Armor

As I've mentioned in a previous post, armor shouldn't be exclusively used as a "whoops, I didn't block that" crutch, but as a tool.  You will get surprised, get back hacked, or miss a block, and the armor will sometimes catch it, cool.  When armor really comes into play is when a fighter can intentionally go into a high-risk situation (like rushing a spear through a couple of shieldmen) and come out intact and swinging.  While it is possible to do so without armor, those extra hits give a few extra options to someone like a shock trooper or flanker to exploit and gives them a much higher chance of success.

The other role of armor is helping manage range against polearms.  Because armor mitigates single-handed stabs, polearms have to approach a bit closer to land a solid two-handed strike accurately. The advantage gained for your team is that your own support weapons can now more easily target the enemy polearms.  This extra protection against one-handed stabs also can prove crucial when defending a friendly polearm because the enemy will be stabbing at or near your frequently.

Sword and board

I saved this for last because it is the most common style on the line.  Shieldmen serve many roles. Their sort of primary role is forming a strong line for support weapons to support.  This means maneuvering to cut off gaps, to block missile sight lines, and to keep a solid formation.  A number of shieldmen must be dedicated to direct defense of support weapons.

While those defensive roles are paramount to a successful line, shields also allow offense that is more unique than other styles.  The ability to rush and survive (just like armor) can have a huge impact on a fight. The shield cuts off many angles that a line fighter would use to counter a rusher, especially when in the hands of a skilled fighter.  In essence, it allows the fighter to almost ignore counters from one side while using their sword to tie up fighters on the other. While a great fighter with two swords could accomplish this, it isn't particularly easy with a shield, let alone without one.

This passive defense is ideally suited for shock troopers and flankers as they maneuver through gaps or in close proximity to the enemy line without support. The typical flanker uses a decently sized, lightweight punch shield that allows them to block off a variety of angles as they engage the line and are surrounded by threats.  In contrast, shock troopers tend to prefer a strap shield better geared for bashing and punching. This is because they will more often be pushing through a line, rather than being between the enemy line and their archers/reserves.

Sunday, September 6, 2015

The New Fighter Primer

I plan for this post to be an annual thing I post during recruitment season.  I'll try to keep it up to date with anything I miss or questions that seem to always come up.

Welcome to Numenor, new fighters! I've been compiling a FAQ of sorts for new fighters.  If you have a question that I've missed here, or an answer doesn't quite hit the nail on the head, let me know.  There is also a list of handy links at the bottom for a variety of sword fighting related topics.

Q: How do I join the club?
A: If you've joined the Facebook group, that's about it.  Show up and hit people during the scheduled practice times.  We'll have extra gear to loan out.  We do have a mailing list you can sign up for, but most of the info you'll want will be posted on the Facebook page. Come and go as you please, and stay as long as you like.

Q: Do I need to bring anything?
A: We have plenty of gear for you to use, but a few essentials like kneepads or padded gloves are a great investments.  Most sporting good stores sell both items.  Many of us use volleyball kneepads and padded lifting or MMA gloves.  As always, bringing water and wearing clothes you don't mind dirtying up is probably a good idea.  Bring your friends, they are even more fun to hit with foam covered sticks.

Q: I have a question or problem, who should I talk to?
A: The local realm has a great group of veteran fighters that can help you out.  Knights (the ones with the fancy garb and heater shield that's shaped like home base) take charge of the local group and have lots of experience with fighting.  Don't be intimidated by all the armor or angry face on the field, we're here to help.  Our squires (knights in training) all are seasoned fighters and usually wear a white tabard.  Any of them should be able to help you out, or direct you to one of us knights if they aren't sure.

At bigger events or other groups, the first stop should be finding a herald (the ones with a yellow tabard).  They are the game's version of a referee and can help you figure out rules problems or point you in the direction of someone who can help you.  If you see anything unsafe on the field, bring it to their attention immediately.

Q: The rules seemed a little too simple, is there anything else I should know?
A: We use the simplest, abbreviated version of the rules for events like Quad Day, so you can come out and get into the fighting quickly.  The full version of the rules can be found on the Belegarth Wiki page, http://www.geddon.org/Book_of_war.  It isn't an easy read, I'll put together a more comprehensive list of common rules questions this week. Also, take a peek at this blog post that explains a few things that aren't in the rulebook.

Q: Should I buy/build my own gear?
A: Eventually, yes.  Use a variety of loaner gear and talk to veterans to get a feel for what your options are before you buy.  Luckily, the guys from Forged Foam usually offer a steep discount to new fighters and bring some gear to practice to sell.  Their usual prices for new people make buying a sword about as cheap as making it yourself.

Building your own is something you can consider.  However, I highly recommend having a veteran help you rather than following some of the online tutorials available.  Many are outdated and recommend materials that may not be as optimal compared to other options.  Forged Foam, and other vendors, do generally sell materials that are better than some of the off-the-shelf options, and at a reasonable price.

Q: Can new fighters use polearms/red weapons/bows?
A: We usually prefer that new fighters wait to pick up more than one handed swords and shields.  Many other weapons add a degree of danger to other fighters, and we'd like to get you some training on the more dangerous weapons before we send you out of the field with them.  Safety is our number one priority.  If you are interested in learning/practicing more advanced weapons, talk to one of us that you see using them at practice.  We'll do some one on one training and then help you get ready to use them on the field.

Q: What is a realm, unit?
A: Realms are geographic locations within the sport.  UIUC is the Realm of Numenor.  ISU has one called Wolfpack just 45 minutes from town.  There are realms spread out all across the country (and internationally), but not all are connected to universities or colleges.  Units are groups of fighters that train, fight, and hang out together. Local units include the Dunedain and Dark Guard.  Some units, like Brotherhood of the Falcon (BOF) and the Urak-hai span the nation, grouping up at major events. If you are interested in joining a unit, ask around and get a feel for each one.  If you can make it to Oktoberfest, it is a great place to get to know units and spend some time hanging out with them around a campfire.

Q: I keep losing, how do I get better?
A: For one, don't get discouraged.  Between learning the rules and getting your body used to swinging a sword, the game can be quite hard.  Remember, some of our veterans have a decade or more of fighting under their belts--they aren't going to be easy to kill.  We'll do more structured training this fall to get people ready for the first major event of the season.  More on that later.

Q: Do you have tournaments, rankings, levels, events?
A: There is a large number of events, some of which are major, weeklong camping events.  Sometimes they have individual and team tournaments at these events.  While there are definitely different levels of skill, there is no official ranking system or levels of combat.  This coming Saturday is our local group's first mini-event of the season.  We'll have food, games, and lots of company.  In October, our group hosts one of the largest events in the Midwest, Oktoberfest, a weeklong event with camping, feasts, tournaments and plenty of nightlife.  Imagine 500+ fighters on a field, pretty epic.

Q: Why do you guys wear that clothing/do I have to dress that way?
A: Garb isn't specifically required for fighting at practice.  The local group usually just asks that you get/wear garb before moving on to using weapons beyond basic swords and shields.  Nationally, garb is required for events.  The minimum garb is outlined in the rules, and we will definitely work with you to get geared up for the first major event.

Q: That guy is definitely cheating, what do I do?
A: There is a long rant here about this.  TL;DR: focus on doing your best to take hits you receive quickly and accurately.  If you suspect someone has missed a hit or cheated, ask them about it after the fight.  Worst case, ask a herald about it.

Q: What is Oktoberfest?
A: Oktoberfest 2015: Sept. 30 - October 4

Oktoberfest (Okfest) is one of the largest Belegarth events of the year.  I believe it was THE largest event in Belegarth for 2014 in terms of attendance.  It is a multi-day camping event with three full days of swordfighting.  Even if you can't get away for the full three days, making it to Friday and/or Saturday is definitely worth it.  Coincidentally, the local realm plans and runs this event each year, and it is only 45 minutes from town.  We'll coordinate to make sure anyone that needs a ride can get to and from the event. There is almost always a group or two heading to/from the event each day.  More details will be posted on the facebook group as the time approaches.


Here are a few other links you might want to follow:

From Oktoberfest 2013 Realm Battles (each realm for themselves): https://www.youtube.com/watch?v=wY7rVmEG0cw

From a nearby event, Wolfpack Opener, a couple years ago:
https://www.youtube.com/watch?v=7t8d5IHEZL0

www.belegarth.com This is the home of the national organization.  The forums have a large amount of information, and links to training videos and guides.

www.geddon.org The Belegarth wiki. Lots of info on units, realms, and people. It is in the process of being made a little more user friendly, but there is basic information buried on there.

http://geddon.org/Book_of_war This is the most readable version of the rulebook we use. There are a few rules that aren't clearly spelled out, but definitely a must read.  I'll post up some common rules that aren't really defined in the book later this week.

www.forgedfoam.com Locally operated foamsmith. They made a large portion of our loaner gear and personal equipment.  The guys will be around selling gear at future practices.

https://www.facebook.com/pages/Lady-Armstrong-Designs/266921383370663  Lady Armstrong is a (formerly) local seamstress that has made some of the fine looking garb you'll see around.  We don't expect new fighters to look that amazing, but it should give you an idea of how cool garb can be.

Spear Formations

Whoo, it sure is dusty in here.  Been a while since I put out a post.  So, of course, why not put out a nice, wordy bit that was supposed to be published months ago.

Last time we looked at Sotahuuto, which was a good sample of spear formations we can see on a larger fighting field.  For Belegarth, a few of these are highly ineffective, due to the limitations on one-handed stabs versus armor and the rules for sufficient force.  However, I'd like to go ahead and include those types of formations here for the sake of completeness.  Hopefully people that fight in other sports can find some value in my evaluation of those formations that don't really make sense for Belegarth.

For starters, what do I mean by "formation"?  While one spear often forms up with a shield man, this isn't necessarily a formation.  This is meant to be more of a big picture perspective, what a whole group of spears and shields working as a unit might attempt.  Learning to combat these well-organized teams of spears will make fighting against the sort of ad-hoc groupings we see on a typical Belegarth field a little easier.  Below you'll find my analysis of strengths and weaknesses of each type.  I've given each one a name of my own design, roughly based on historical terms.

Types of Spear Formations:

Ad-Hoc

The ad-hoc formation is your typical mismatched group of fighters with the occasional spear or support weapon.

Strengths:
  • Spears can operate independently and adjust position easily
  • Easy for spears to deploy after fighting starts, boosting their effectiveness
  • The line isn't dependent on the spears and can move freely
Weaknesses:
  • Less coordination between spearmen
  • Spearmen often have to rely on random shieldmen
  • Spearmen must look after their own safety, because the formation isn't geared to protect them
How to Kill It:
  • Avoid the spears and push elsewhere
  • Kill pocket--try to force individual spears into a bad position and counter them with spears from the flanks
Phalanx

A phalanx is a unit consisting of nothing but spears, preferably very long spears (15' or so).  By arranging themselves in tightly packed ranks and files, they are able to concentrate their offense.  These are exceptionally rare in Belegarth (maybe almost never), but we did see one group in the video from Sotahuuto attempt it.

Strengths:
  • Very concentrated offense
  • Long range versus most other fighters
  • Overlapping spears help defend against rushers
Weaknesses:
  • No/limited defense against missile weapons
  • Cumbersome--many people tightly packed make it difficult to maneuver
  • Manpower intensive--it takes many people to fill in the formation compared to other solutions
  • Very limited attack and defense at "point blank" range
How to Kill It:
  • With Arrows!--even blindly firing a volley will get kills
  • Out-maneuver it--the formation can't hold together well on the move or while turning
  • Flank it--use part of the group as a distraction while the rest attack from the sides/rear
  • Kill Pocket--let the spears push into the center and fold in on their flanks, this forces the spears to spread their offense as the frontage expands in the curve.
  • Overrun it--a well timed, full line charge where everyone pushes forward can succeed.  This is very risky.
  • The wedge--a small group of well armored fighters concentrate a charge up the middle.  Their goal is to force the spears to fight at point blank.  This is risky, but less so than a full overrun.

Shielded Phalanx

Like a phalanx, but with the front rank equipped with swords and shields. Still not likely to see it in Bele.

Strengths:
  • Better missile defense than a pure phalanx
  • Strong defense against rushers
Weaknesses:
  • Still cumbersome
  • Loses some offense/range from first row of spears vs. a pure phalanx
  • Shields can cut off some lanes of attack for the spears
How to Kill It:
  • Out-maneuver it--the formation can't hold together well on the move or while turning
  • Flank it--use part of the group as a distraction while the rest attack from the sides/rear
  • Kill Pocket--let the spears push into the center and fold in on their flanks, this forces the spears to spread their offense as the frontage expands in the curve.
Hoplights

Something you won't see in a Belegarth field today, an entire group of shield/spear wielding fighters.

Strengths:
  • Greater range than a sword/shield formation
  • Solid defense against missiles
  • Very maneuverable (for a spear formation)
  • Much better at closer ranges than a phalanx against unarmored foes
Weaknesses
  • Can't effectively fight armored opponents (in Bele)
  • Still has difficulty fighting at point blank
  • Outranged by longer spears/glaives
How to Kill It:
  • Tank out--shove armored fighters down their throats (in Bele)
  • Range--Use longer support weapons and fight defensively
  • Charge--They aren't good at fighting super close, get in there all together and fight them at point blank. 
Interlaced

In between every shield is a spear.  Every other person in the line is a support weapon.

Strengths:
  • Strong defense/offense mix
  • Every spear has someone to hide behind against missiles
  • More maneuverable than a shielded phalanx
  • Spears are very cooperative and have overlapping ranges
  • Efficient use of manpower to cover an area. (for a spear formation)
Weaknesses:
  • Often has uneven skill distribution--there is likely a weak spot at a spear or two
  • Relies on spears cooperating to be effective
  • Rarely has a backfield/reserves--vulnerable to minor breakthroughs
How to Kill It:
  • Vision gaps--a wavy line can cause vision gaps that allow a small group (or one fighter) to get behind the formation.
  • Wedge/Rush--a practiced fighter can rush a spear with a little support or distractions.  A group can force their way through.
  • Coordinated Missiles/Spears--a shieldman can't cover themselves and a spear from multiple angles of attack. Have archers and spears coordinate against a pair at a time.
Triples
One spear, two shieldmen. The main difference between interlaced and triples is that the triples act with much more independence than a typical line. Usually, the spear is on charge of their triple.

Strengths:

  • Strong at close range
  • Resistant to missile attack
  • Usually has most experienced fighters using the support weapon and leading the triples
  • Harder to rush against
  • Can exploit gaps and be used to flank
Weaknesses:
  • Less coordination between support weapons
  • Easier to cause gaps between triples
  • Support weapon doubling as a command element makes it a priority target for missile weapons
How to Kill It:
  • Kill Pocket--try to pull one triple into the pocket
  • Flank It--have 1-2 shieldmen engage each triple from the front, keeping the spear's attention. The rest need to maneuver around and between the triples.
  • Rush Them--assassinate the triple's commander/support weapon.  A skilled fighter can make it through the middle well enough to kill them.  Gets riskier as their shieldmen improve in skill.
  • Out Support Them--triples have less support weapons than other spear formations, if you can get a few extra spears to help out against them, it drastically reduces their effectiveness.


Tuesday, January 27, 2015

Replay: Sotahuuto 14

Ok, this is something new to me and the blog, so hopefully you find it useful.  If it seems helpful, I'll look into doing other posts in this type of fashion in the future.

A reader from Europe sent me a link to video from one of the large foam fighting events they've attended over there.  While it isn't Belegarth rules (tap fighting, head legal, and a few others), the video does illustrate a few concepts that are universal to the large scale fighting we see at events.  Please note, those are indeed 15' spears you see everywhere.

Here's the video, it's nearly 40 minutes of quadcopter footage of the event.  The noise from the copter might be a little annoying, fair warning. Those later castle battle are pretty insane and worth a watch, especially with destructible haybale walls. However, I really only want to look at the first battle for this post.  I chose this first fight to look at because it illustrates how important maneuvering can be.  If someone wants me to look at other fights or videos, I'd be more than happy to later.

 
For starters, our friend from Europe and his group are among the black/purple clad group at the center, we'll call their team the good guys.  The green group to their left appears to leave an intentional gap, I suppose as a trap or some variant of a kill pocket (the blue area marked below).  The right flank has pushed forward aggressively, just out of frame in this first picture.  We can see a gap, marked with yellow start to appear even this early in the fight.
 
Maneuver Phase of the battle.  Blue=intentional? gap.  Yellow=Gap to watch later


Other keys to this part in the battle are how the enemy forces are arrayed. Directly ahead of their middle, the good guys are up against a high (insanely high compared to Belegarth) concentration of spears.  They've already grouped up and have no signs of changing course.  The enemy line is already curving away, bowing out towards our friends.  This makes the entire field a scaled up version of a kill pocket.
 
Stalemate Phase of battle.  Even the spears are mostly at max range. 
The enemy has cut off the flanking group, but haven't fixed that gap yet.

 
Once the lines are close enough to engage, we reach the stalemate phase.  At this point one would expect that our little yellow gap here would have been closed up, but groups maneuvered away from it to engage our friendly flanking groups.  The enemy black/yellow group pushed out to engage, leaving only a few skirmishers to cover the area.  We can also see that the friendly lines haven't engaged the outside corner at all, leaving a large chunk of forces to the right flank of the black/purple group essentially in reserve.


The moment when decisive action could be taking place. 
Easily could have happened sooner than it did in the video.
Black lines are what I would have my line do at this point.
A closer look at the gap.  The group friendlies directly across from
it eventually push through.


This all sounds like a huge advantage for the friendlies, and it is.  However, there are few things that could have helped our purple/black friends survive the encounter a little better.  At the point pictured above, we see that gap still lingering around unopposed.  We also see our purple/black friends keep a solid line in the face of that giant mess of spears (highlighted in red).  The problem here is that holding their ground actually costs them a lot of casualties as we'll see when the copter makes another pass later.  The black lines here are what might have helped them get through this mess with a few more fighters intact.  Rather than standing strong against the concentrated spears, the line should have spread out (towards the right flank) while forming a kill pocket (the curve back marked here). 

By shifting forces to the right of the main enemy strength, it reinforces the group that should have already been pushing that gap.  By spreading out and backing away, it forces the enemy formation to spread their offense in different directions, preventing a whole group of fighters from being lost quickly.  Those directly opposed to the spears need to fight purely defensive and let the enemy advance.  Their whole goal is to buy time for flankers flooding through the gap to win the day.

When we see the camera come back to this section, we see that the group along the right flank that was engaged with the enemy black/yellow group joined with a few of the friendly corner group to push the gap (finally), but by time this happens our black/purple friends have been cut to shreds.  This makes the clean up much more difficult later.

The moral of the story: engaging a spear formation head on is rarely the best course of action. Making use of defensive maneuvering can both save lives and set up your enemy for being flanked.  Keeping an eye out for gaps early in the fight can give you some idea of where they will be later.  This particular case shows that they often form between two groups of fighters that are good at maintaining their own coherency. Because groups/units don't usually share leadership, you'll find groups can often lose track of their support unless their own anchors are doing a great job of keeping the whole line together. Creating/attacking/exploiting these gaps can be crucial to killing enemy formations and skilled groups.

In my next post, I'll take a look at some strategies for taking down spear formations.  It's a lot to cover, so I didn't want to include it all here. 

Tuesday, January 13, 2015

Small Unit Tactics


Not all groups enjoy the thick fighting at the center of a solid line.  Others lack the experience, numbers, or equipment to do so successfully. These groups often suffer at larger events, where the lines are densely packed.  Skirmish tactics work a little differently when facing such lines, as opposed to the more open fields of their home practices. A skirmishing group needs to capitalize on their best asset: maneuverability.

A skirmish line will quickly be picked apart should they face a group of experienced line fighters directly, especially if numbers aren't in their favor. However, this doesn't mean skirmish lines are incapable of winning the fight.  It takes a different approach for them to succeed.  Rather than attempting to rush into a line fight, the skirmishers need to fight the front of the line on the defensive. Their main goal has to be survival, only taking advantage of a few kills as opportunity presents them. By keeping mobile, they might be able to get the enemy to spread out or lose track of a few of the skirmishers. By drawing the enemy directly ahead, a few people on the wings might be able to flank around the enemy.

While most people "flank" by merely running past the ends of the lines until they are far enough to get around unopposed, a little more teamwork and tactics can make flanking a much stronger, faster tactic.  It is best to work in groups. Pairs work fine, but larger groups have more options.  Each group must set for itself a goal of delivering one fighter (or small group of fighters) the enemy's back.  This mindset allows flankers to function much closer to the core of the fight and still get someone behind the lines unopposed.  As an added bonus, some of these tactics also apply to heavy line fighting for shock troops, which could help a group transition to that style of fighting later. 

Let's look at a few specific strategies. 
 

Pin and split

Pin and split is my generic term for a great move that you can accomplish when, as a flanker, you outnumber the enemy that is in your way.  At its most basic, a 2v1 situation, one person engages the enemy, allowing the other to slip by unopposed.  Regardless of how well the pin survives, they buy their teammate plenty of time to cause havoc.  This strategy also works well for exploiting the edges of a gap in the enemy line. 


A larger group of fighters can enact this strategy well, even doing so multiple times as new threats approach.  Each time an enemy turns to counter them, the minimum number of flankers peel off to pin them as the rest continue flanking.  Remember, the goal is always to get at least one fighter to the rear of the enemy's main line.

Another extremely effective way to use this strategy is to counter flankers.  If your own team's flankers have become bogged down on the flank, fighting a line battle, the two fighters nearest them could try to pin/split against the enemy anchor.  The second closest to the end engages the enemy anchor heavily, probably fighting a 2v1 on the enemy flank.  The friendly anchor is then free to backstab the enemy flankers, freeing up a large force.  This is an exploit of the gap between the enemy line and their flankers, but could be used against almost any gap.


Wolfpacking 

When outnumbered, but not outmaneuvered, a team can attempt to split up.  By being more mobile than the larger force, their goal is to survive and pick apart any stragglers they can until the smaller force has a decisive advantage.  The skirmishing team still needs a few people to take the enemy head on.  When the enemy advances, the line spreads thin, leaving just a few fighters to keep the attention of the enemy core.  The rest flank around, using strategies like the pin and split. 
 

However, because the skirmishers are outnumbered, getting into the enemy backfield alive is going to be difficult, if not impossible, until several enemies are dispatched.  If the skirmishers can manage to  get their flankers to meet up behind the enemy (turning the line into a circle), they are now free to run in opposite directions.  At this point, the skirmishers must work off of each other.  By running in opposite directions, vision gaps will eventually be created that allow one of them to pick off an unsuspecting enemy.


A large part of the strategy requires that each skirmisher acts as a distraction first, staying alive as best they can.  Then, only take shots that are nearly guaranteed hits.  Kills are preferable, but legs will help reduce the enemy's ability to maneuver against you and arms will help soften them up for future attacks.
 

Pairs

Small groups should learn to work in pairs when possible. The goal is to develop tactics that work well when targets are isolated, while maintaining some safety in numbers. While you won't always be able to make a 2v1 situation happen, you want to be able to win the fight without losing much of your capability. 

You may find 2v1 drills particularly useful.  It helps build teamwork for the pair and helps the solo fighter practice for being outnumbered.  The pair has a goal of killing the solo without either of them being hit, while the solo tries to land a single hit on the pair.  Alternatively, you could have the solo fighter try to stay alive for a set amount of time or number of swings. This can help them prepare to be a pin or to keep the core of the line busy for a wolf pack strategy. 

One strategy for a pair is to plan, in advance, where to swing.  For example, one will swing high to the sword arm, while the other swings low to the shield side hip.  This forces the enemy on the defensive, because their shield will usually not be able to cover both angles, forcing them to block with their sword or die quickly.  Following up with a couple of swings will likely kill the target, as long as both keep the pressure on them. 

When the pair is on the defensive, it becomes important to not only block for your partner, but lure enemy targets out for them.  You can fake swings to try to get the opponent to counter, leaving their arm open to your partner.  Placing swings to one side of their shield or guard might draw their defenses over, letting your partner attack the other side. 

Against a solo opponent, the pair needs to move such that both can swing at the target or so that neither can be hit easily. The most favorable positions for the pair are either with the solo fighter facing the gap between the them, or with the pair slightly offset towards the solo's sword side.  This allows both to swing, and the latter gives a great angle against their weapon arm. 


"Good" in this case, relative to the pair. 
 
On the flip side, the solo fighters will need to use solid footwork and sword blocks/parries to stay alive. Most of their footwork will have them backing up, often to an angle.  Against a pair, their goal is to isolate one of them by stepping away from the other.  His preferred positions are either lined up against his sword side opponent (so his shield blocks off the other well), or with one enemy blocking off the other's angle of attack.  The second one is harder to pull off, but is the safest.
 

Communication 

I can never seem to stress this enough, but communication is vital to success as a small force.  Even without a command structure or leader, the group needs to all be aware of the overall plan.  Without communication, strategies like wolfpacking can quickly fall apart into chaos. 

Experienced vets may be less verbal, relying on their combined experience and reacting to the situation as best they can.  However, even vets will make sure to communicate openings they see or dangers around them. Starting out, simple communications like when to move or change spacing are necessary (vets usually adapt to the space well, without needing specific commands for it). One thing all groups need is a direction or target, and communicating that goal, or changes to it, should be a priority. 

Call out dangers to your line.  Call out targets, gaps, and weak points in the enemy line.  Equally important, relay calls from others.  For example, if you line needs to shift right, and you hear someone call it out, then you should repeat it down the line. Warn your allies of arrows about to be loosed, javelins at the ready, or support weapons taking notice of their flank. It is a lot to keep your mind on, but the more of these things you can keep your team informed about, the more successful they will be.
 

Leadership ("Driving the bus") 

Smaller groups sometimes lack any sort of command structure.  Even large realms have many people that could take charge, but no clear, default leader. That doesn't mean they lack leadership. In these groups, individuals usually take charge of the area around them as needed. Groups of veterans often have a very decentralized form of command, especially during a protracted line battle where individuals manage their own area. Those with the best line of sight, or that notice problems sooner, often begin taking charge of the few people around them. 

If someone else is issuing orders, do your best to support them.  Note, I didn't say "blindly follow a terrible plan".  Support the plan by maneuvering yourself and others in a way to help the plan succeed.  This might mean moving to cover a gap that no one else saw or being aggressive to draw the enemy's attention. Sometimes it means doing something that is opposed to the orders, such as taking a run through a gap rather than standing your ground.  The overall idea is to make the group more successful at its current mission. 

If no one is taking charge or communicating, take command and do your best to help the team.  Even a bad plan is usually going to be better than no plan. When it comes to actually taking charge of the group, do your best to navigate the group into favorable fights.  Try to issue orders that make sense for who you are ordering around, ie. don't have the 300 lb guy in full armor and a tower shield flank.  Play to your group's strengths.  More armored up fighters will need to form up against the bulk of the enemy, while faster fighters need to maneuver around. Try to engage targets such that your backfield is relatively safe (not facing the majority of the enemy groups). 

Most of the fight relies on your individuals finding success, but issuing commands to regroup or shift the line can give those individuals a better chance to survive.  Your goal, as leader, is to maintain the line during a fight.  Watch for gaps and weak points in both lines and move your forces to exploit or counter them.  Learn to spot vision gaps, especially along the enemy flank.  If their anchors aren't paying attention or are drawn into a fight, deploy a few flankers around them.  If your flankers need a better angle, shift the line to present the enemy's back to them. 

"Driving" isn't easy, even in a small, skilled group. Don't be discouraged by a bad fight or if you think you may have made a bad call.  Learn from the strategic failures and try to fix any issues with communication within the group. You'll get a chance to redeem yourself next fight. 

One side note, when a small group is part of a large team, they should do their best to integrate with the group.  Issue commands not only to your group, but those around you that lack leadership.  This is a great opportunity for smaller groups to get a better feel for line fighting, and working with support weapons.  Also, don't hesitate following orders from outsiders in this scenario, especially ones that seem to know what they are doing.
 

This section probably could be its own post.  I might try to put together a more detailed version, perhaps as a post-mortem next time I drive the BOF bus.